The B-17 Flying Fortress, Part 2 – Crew
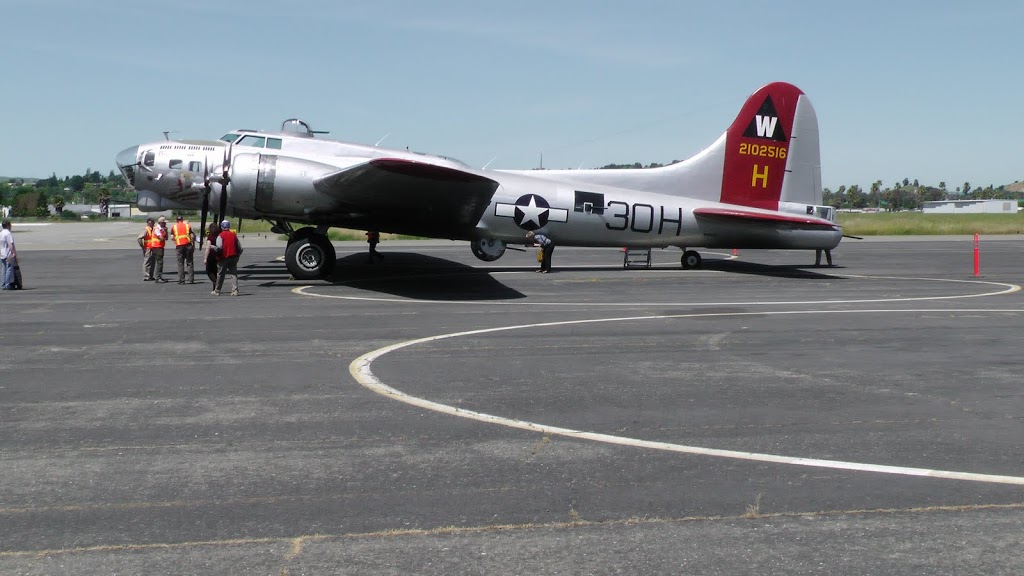
B-17G Aluminum Overcast owned by the Experimental Aircraft Association, Buchanan Field, Concord, CA, 2 May 2011 (Photo: Sarah Sundin)
Few World War II airplanes have captured the imagination like the Boeing B-17 Flying Fortress.
Today I have the privilege in taking a flight in Aluminum Overcast, the restored B-17 owned by the Experimental Aircraft Association. This is the second of a three-part series on the legendary Flying Fortress – a starring side character in my novels.
Last week I talked about the plane (Part 1), today about the crew, and soon I’ll share photos and video from my flight.
Crew Loyalty
Both the B-17 Flying Fortress and the B-24 Liberator were used by the United States Army Air Force as long-rage, high-altitude, four-engine heavy bombers. A friendly rivalry grew between crews of the “Fort” and the “Lib.” On paper, the B-24 seems to be the winner, with a higher speed, larger bomb load, and longer range. But fans of the B-17 not only liked its graceful lines and the ability to fly at higher altitudes, but its ruggedness. While the B-24 had a tendency to break up when ditching at sea, the B-17 was more likely to stay intact, and the survival rate from ditching was far higher in the B-17.
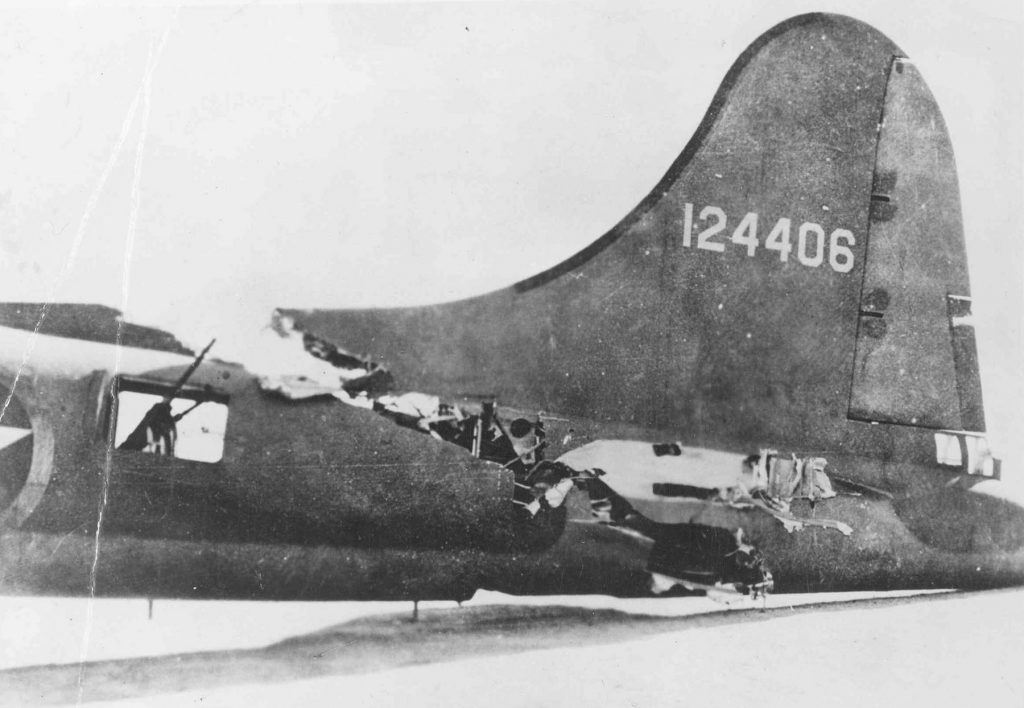
All-American, a B-17F almost severed in half by a collision over Tunisia. The pilot compensated for the lost and damaged controls and brought the plane home. Miraculously, even the tail gunner survived. (US Air Force photo)
The Flying Fortress could take lots of damage and still get the crew home. The photo above shows the All-American, a B-17F almost severed in half by a collision over Tunisia. The pilot compensated for the lost and damaged controls and brought the plane home. Miraculously, even the tail gunner survived. Numerous stories like this brought fierce loyalty from B-17 crews.

B-17F of US 94th Bomb Group over Marienburg, Germany, 9 October 1943 (US National Archives)
Over time, the B-24 became favored in the Pacific for its range and bomb load, while the B-17 became the heavy bomber of choice in the European Theater.
The Crew in the Cockpit
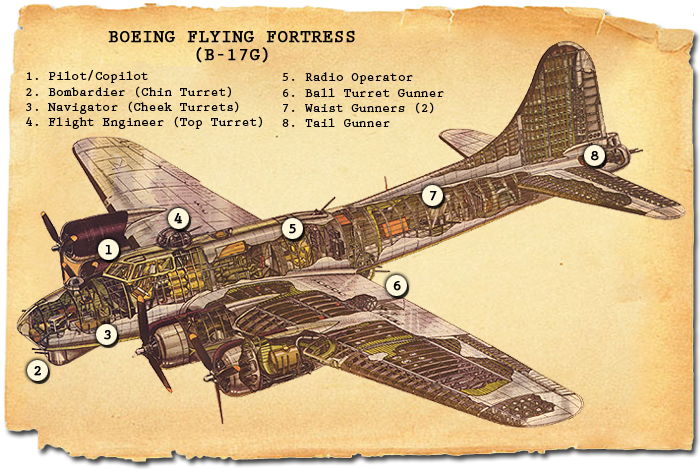
Cutaway diagram of a B-17G Flying Fortress (Sarah Sundin)
This cutaway view of a B-17G shows the positions of the ten crew members.
The pilot and copilot sat at position #1 in the cockpit. Both started as lieutenants. The pilot also served as crew commander, in charge of discipline and morale. The copilot assisted the pilot in flying the plane and could take control if the pilot was disabled. During a mission, the copilot took responsibility for interphone communications with the rest of the crew.
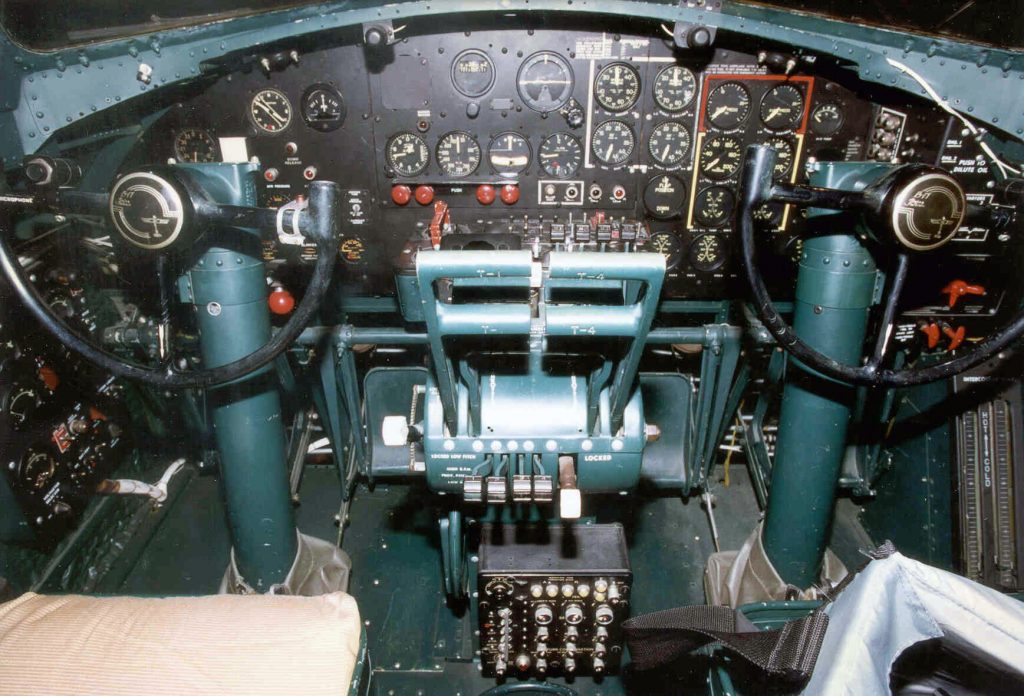
Boeing B-17G Flying Fortress cockpit at the National Museum of the U.S. Air Force. (U.S. Air Force photo)
Just behind the pilots stood the flight engineer/top turret gunner (position #4). A technical sergeant, this man knew the plane’s operating systems extremely well and took responsibility for repairs in flight. In combat he operated the top turret gun.
Crew in the Nose Compartment
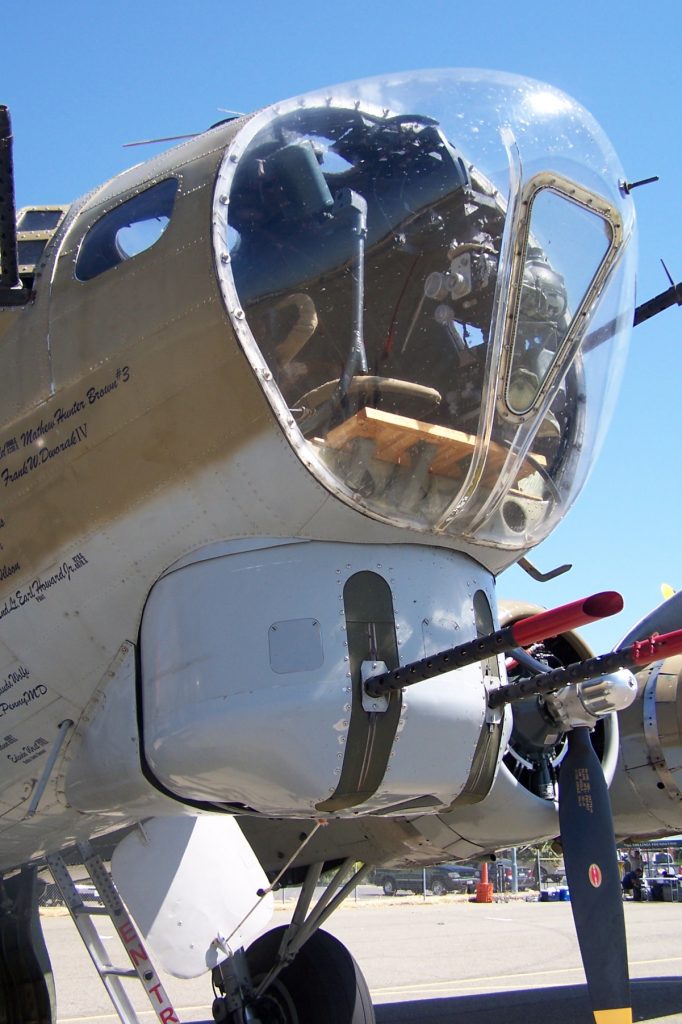
Close-up view of nose of Collings Foundation B-17G Nine-O-Nine, Buchanan Field, Concord, CA, June 2013 (Photo: Sarah Sundin)
The nose compartment was separated from the cockpit by a narrow crawlway. The navigator, a lieutenant, sat at a desk at position #3, where he carefully charted the plane’s position and course using dead reckoning, pilotage, radio aids, and even celestial navigation. Although B-17s flew in large formations, each plane had to be able to find its way to the target and home if separated from the group. In combat, the navigator was responsible for the left cheek gun (in the B-17F) and for both cheek guns in later models of the B-17F and in the B-17G.
The bombardier also served in the nose compartment (position #2). A lieutenant, the bombardier was responsible for loading the bombs on the ground, arming the bombs in flight, and most importantly, for accurately aiming and dropping the bombs. He operated the Norden bombsight, a complicated piece of machinery that took into account the plane’s speed, wind speed and direction, and drift to more precisely hit the target. Later in the war, fewer bombardiers were trained, and a “togglier” served in most planes. The togglier released the bomb on the signal of the lead aircraft in the formation but did not operate the Norden. The bombardier operated the right cheek gun in the B-17F, the nose gun in the later B-17F models, and the chin turret guns in the B-17G.
Crew in the Radio Compartment
Heading back from the cockpit, we walk through the bomb bay along a narrow aluminum catwalk. On either side, racks hold bombs on the way to the target.
Behind the bomb bay sits the radio compartment, home of the radio operator (position #5), a technical sergeant in charge of the multiple radio communication and navigation devices on board the plane. In some models, the radio room contained a machine gun, which fired out of the roof to the rear. However, vision was limited and most groups did without the extra weight of this gun.
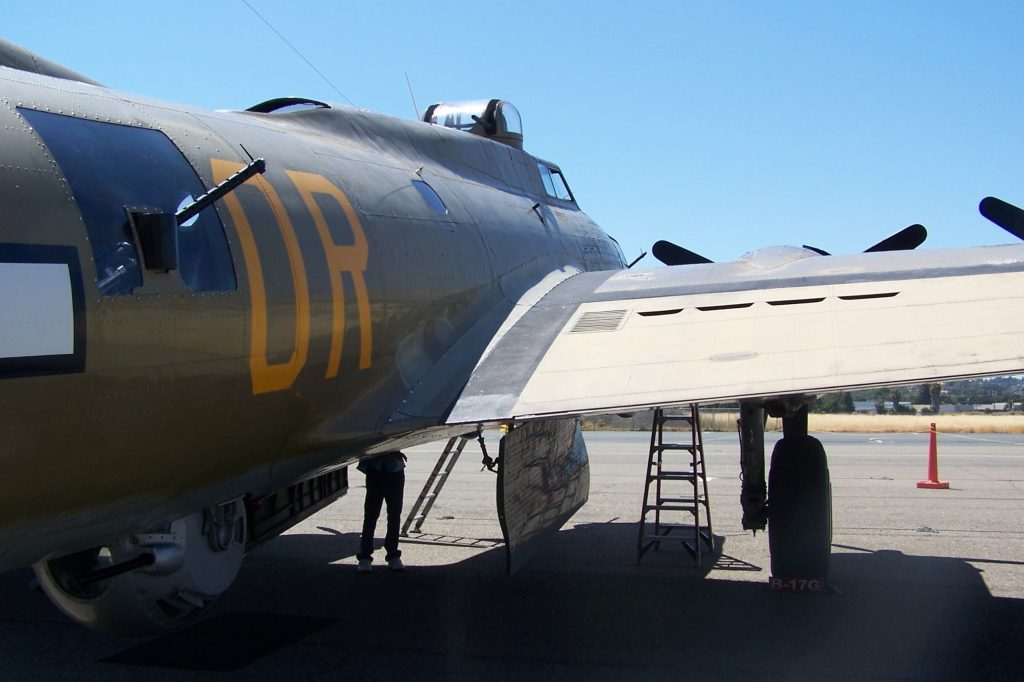
Close-up view of Collings Foundation B-17G Nine-O-Nine, showing (L to R) the waist guns (center) and ball turret (below), open bomb bay doors, top turret. Buchanan Field, Concord, CA, June 2013 (Photo: Sarah Sundin)
Gunners in the Waist, Belly, and Tail
Four staff sergeants manned the guns in the ball or belly turret (position #6), to the left and right in the waist compartment (position #7), and in the tail turret (position #8). In addition to constantly watching for enemy fighter planes, these gunners also monitored the positions and condition of other planes in the formation. The ball turret was a cramped location, so the smallest crew member usually took this station.
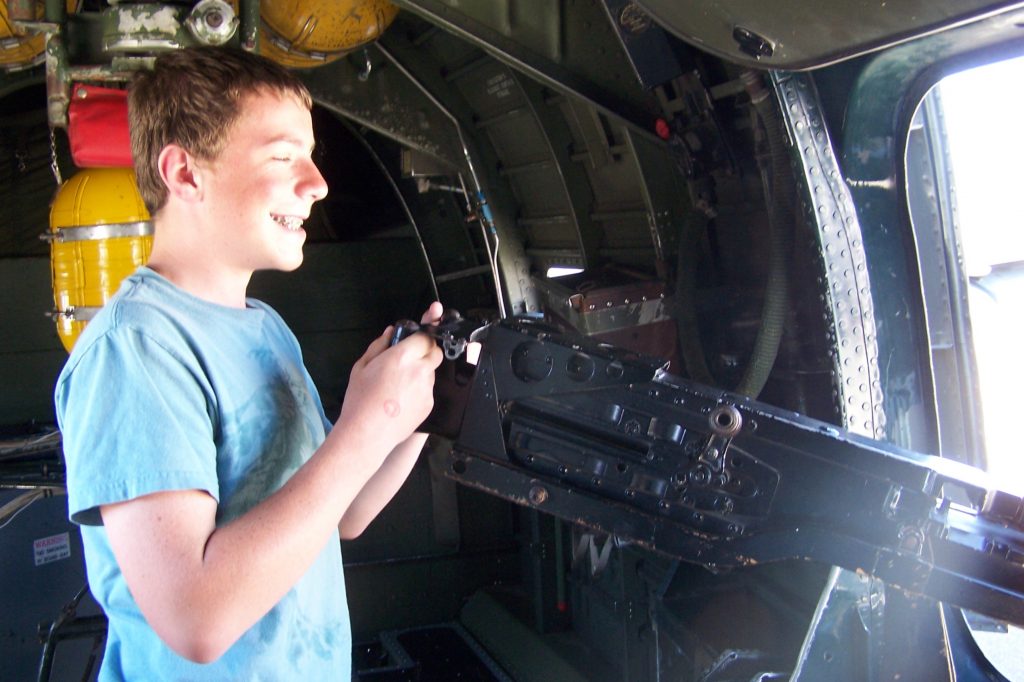
My youngest son manning the waist gun in the Collings Foundation B-17G Nine-O-Nine, Buchanan Field, Concord, CA, June 2013 (Photo: Sarah Sundin)
If you ever have the opportunity to walk through a B-17 – or fly in one! – imagine ten men at their stations, all wearing heavy high-altitude flight gear, including parachutes, life vests, and flak vests. Then imagine them at -40 degrees with flak and fighters in all directions. You’ll gain a deep appreciation for what our veterans did for the sake of freedom.

I hope today’s flight is fabulous! What an adventure! Can’t wait to hear about it!
Thanks, Kate! Can’t wait 🙂
My sons would LOVE to walk through a B-17!! LOL, so would I for that matter! And to fly in one? wow. ENJOY!! Can’t wait to hear about it!!
Thanks, Patty! The walk-through is incredible in itself – talk about living history! The flight…well, that was a once-in-a-lifetime experience. I absolutely loved it.
Great blog! My great uncle was a ball turret gunner with the 388th BG / 563rd squadron. I recently met 2 veterans from the 390th who were ball turret gunners, shot down and spent the rest of the war in Stalag XVII
Arsenal – thanks for visiting! I’m glad you enjoyed the article. My great-uncle was a pilot with the 94th BG – and today I met a pilot with the 390th. The more I learn about the war, the more I admire what those men did.
This is so interesting Sarah, thanks for sharing. I didn’t know that the survival rate in the Forts was so much higher, amazing. I hope you had a fantastic day flying in one…I’m jealous!
Rachel – the survival rate for ditching at sea was significantly higher in the Fort, but overall there were equally high (VERY high) rates of mortality for both B-17 & B-24 crews. With flak and fighter attacks, both planes were very vulnerable.